Natalie Foofat, Patio Gardens –
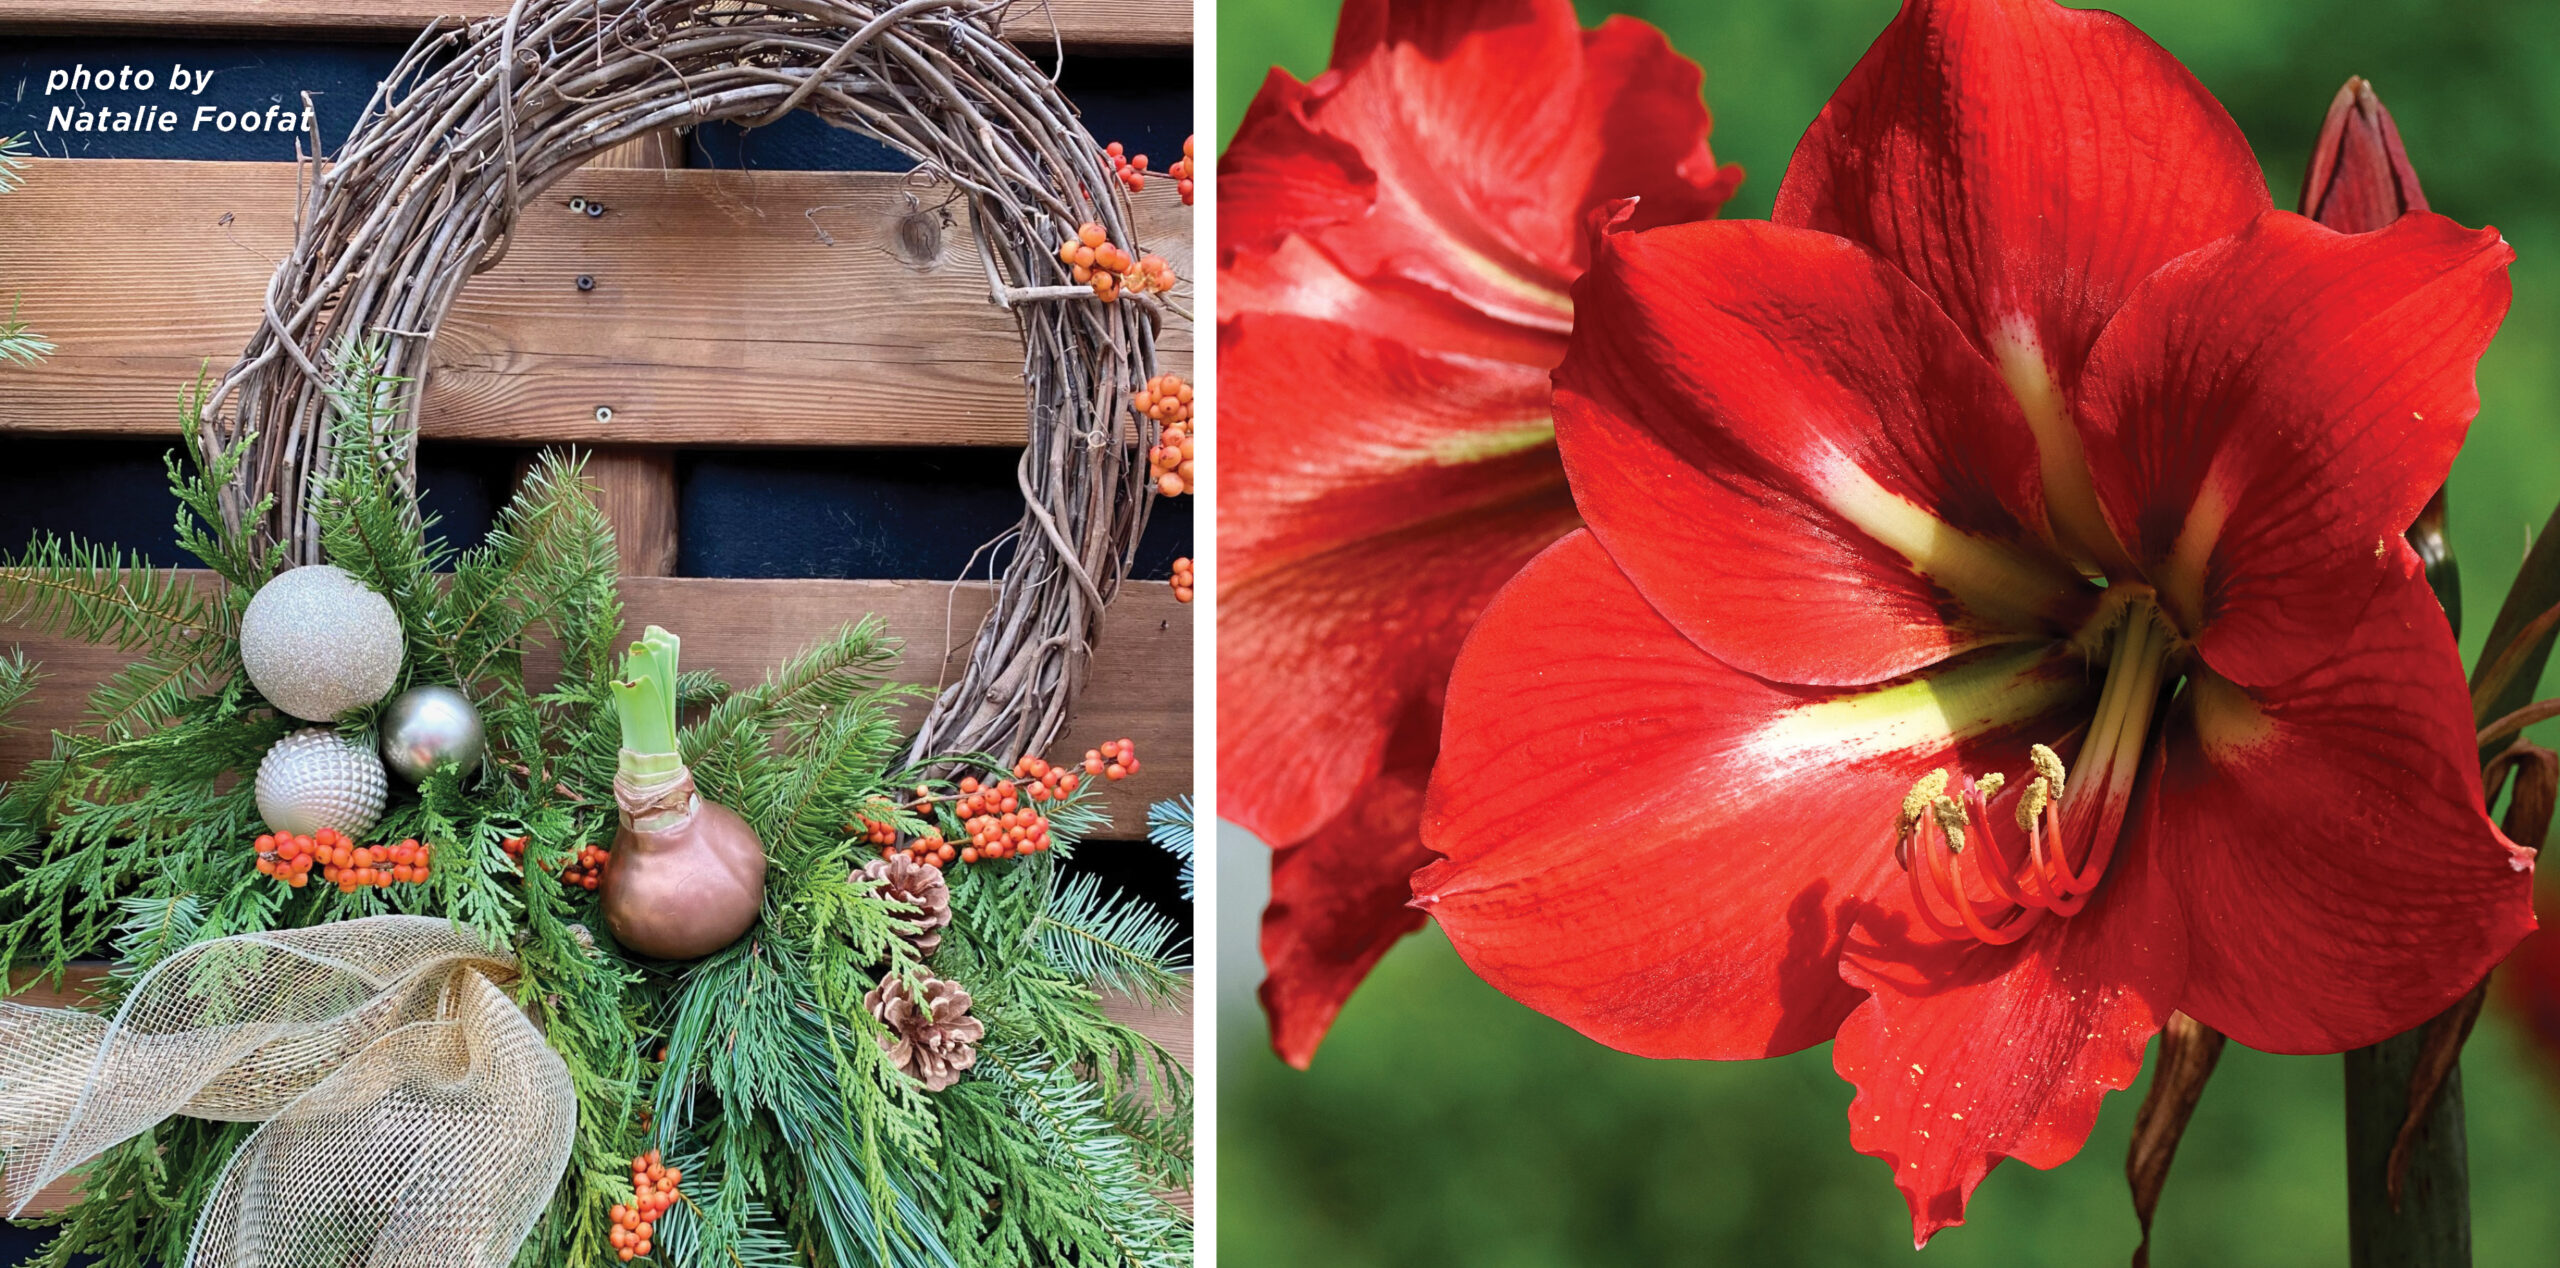
Enjoy this elegant winter wreath indoors, and get a beautiful surprise when it blooms! Wax-coated amaryllis bulbs are incredibly easy to use – especially for non-gardeners. They make wonderful gifts and are a stylish addition to home décor, as seen in this wreath.
Tools & Supplies
Grapevine or wooden wreath base (12-14″ diameter)
Wax-coated amaryllis bulb
Fresh-cut greens (4″-12″ lengths, such as cedar, fir, or pine)
Malleable 20-gauge wire (for tying), decorative accents (bobble ornaments, ribbon/bow, berries, cones)
Optional: moss (2-3 handfuls to create a moist pocket for your greens)
Instructions
1. Prepare Your Wreath Base
Begin by placing your grapevine or wooden wreath base upright. It’s easiest to do this while the wreath is hanging, to ensure it remains stable during assembly.
2. Attach the Wax-Coated Amaryllis Bulb
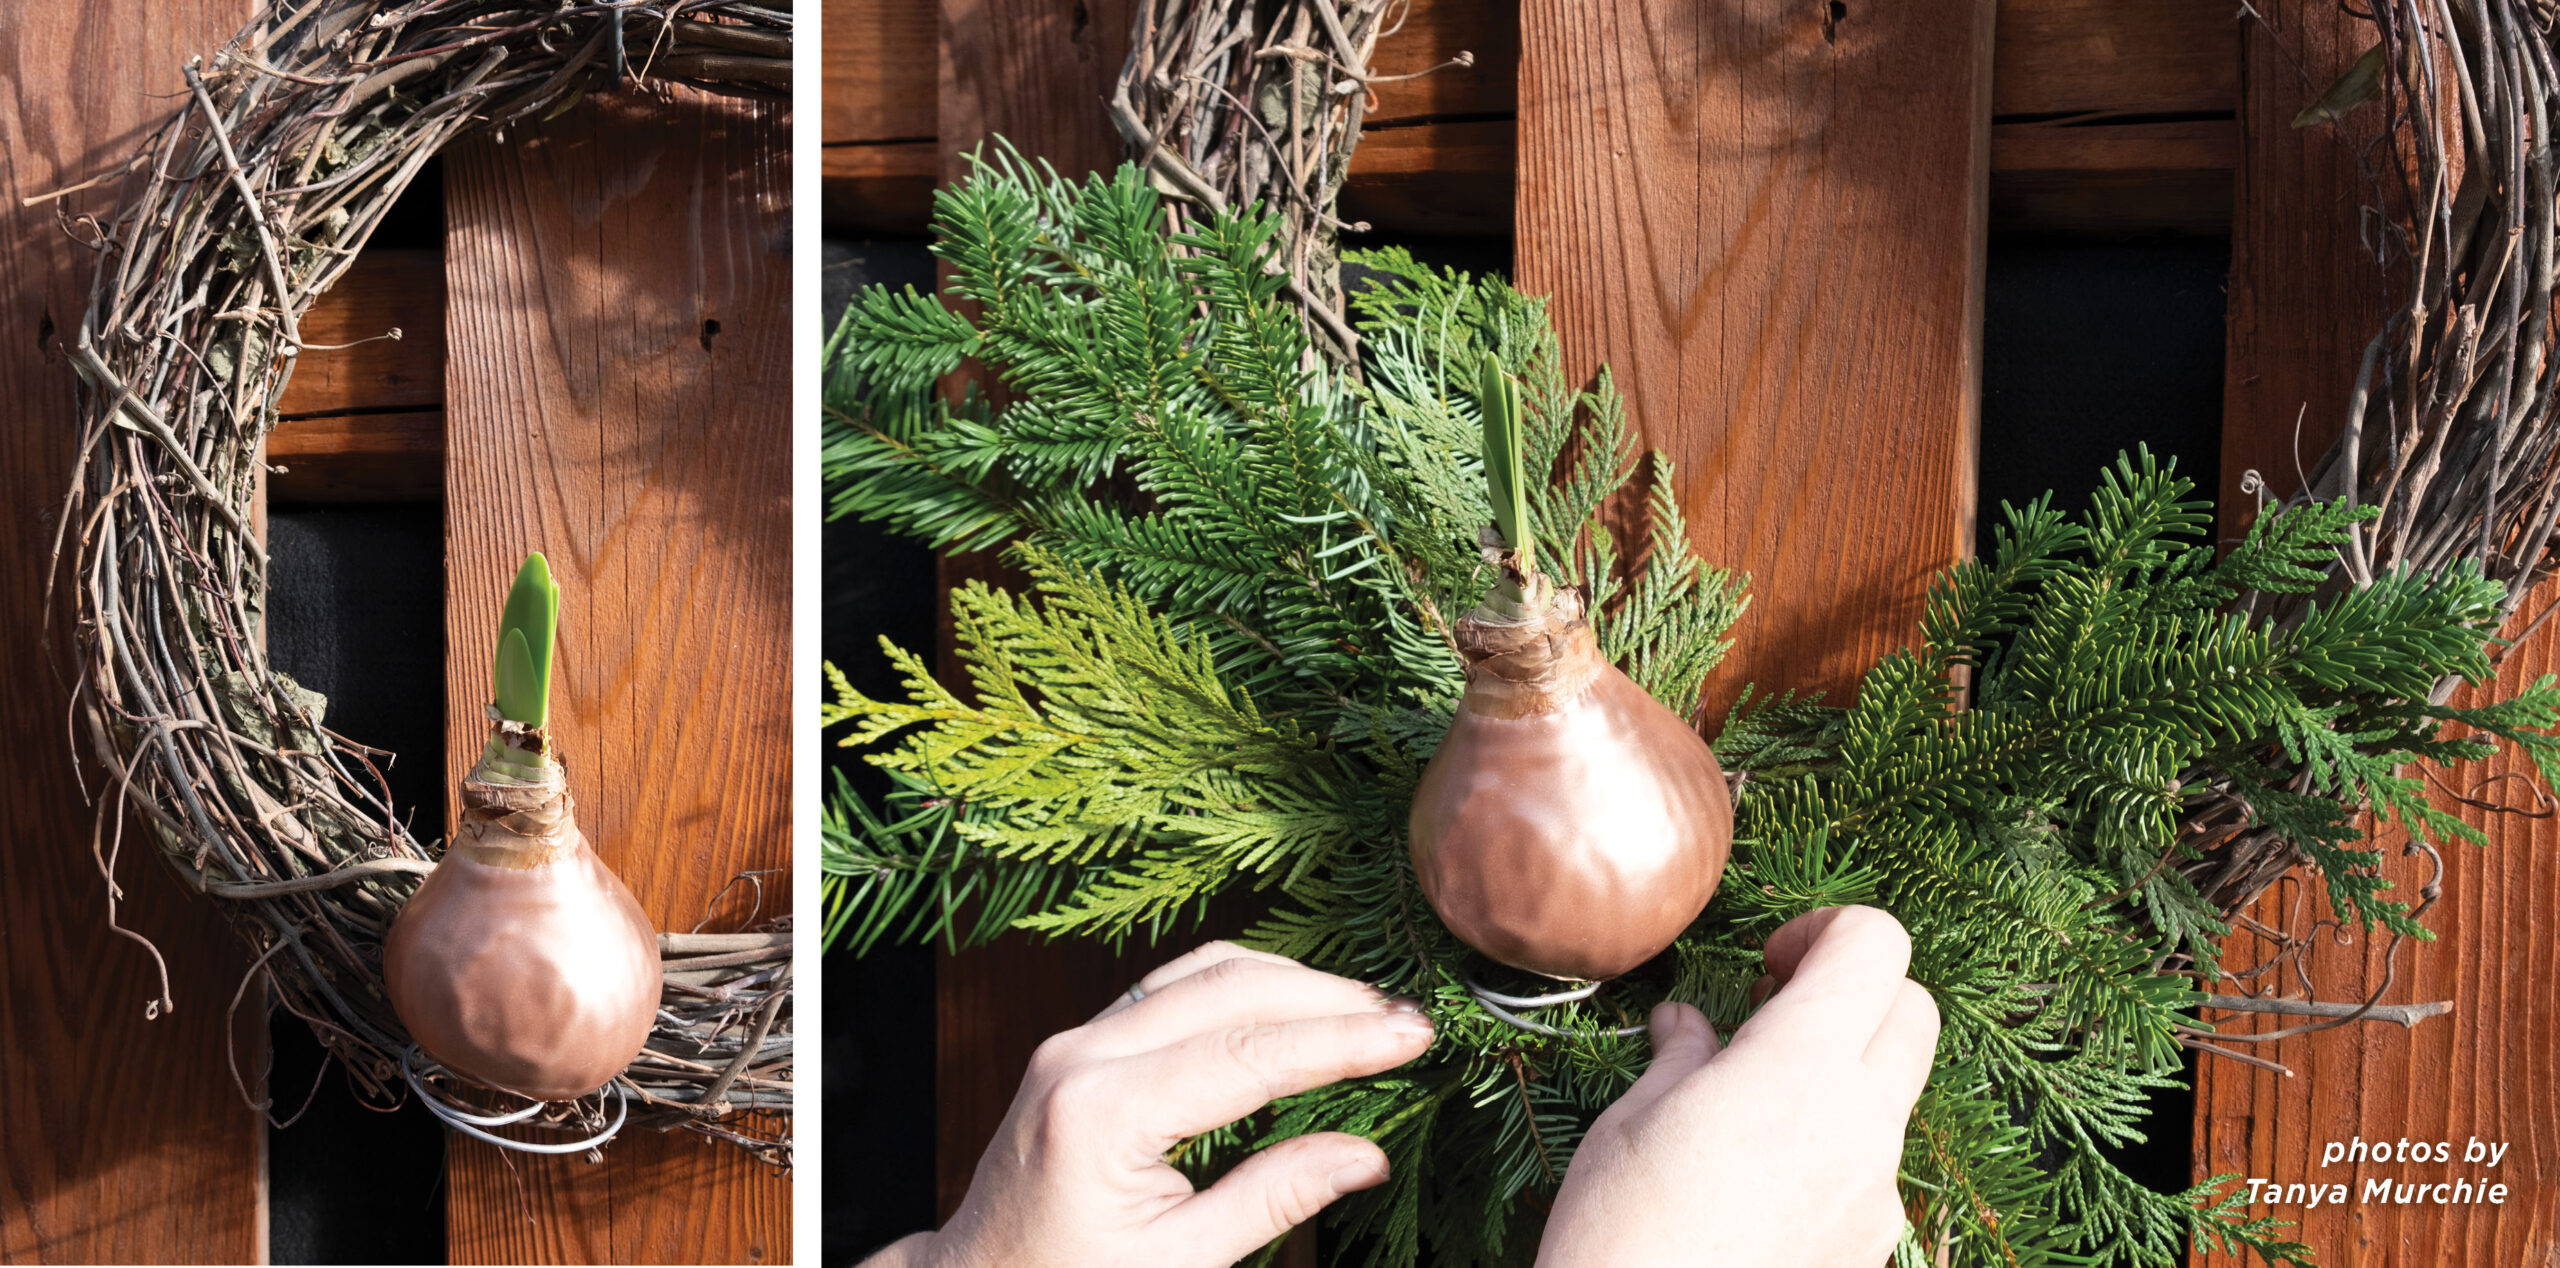
Secure the wax-coated amaryllis bulb to the bottom inside curve of the wreath using wire. Position the metal base of the bulb on the wreath and tie the wire tightly enough to secure the bulb, but avoid pulling it so tight that the metal base is compromised. For extra security, you can use wire or fishing line around the bulb itself. However, be careful not to damage the foliage of the bulb. Make sure the tip of the bulb faces upwards. If you prefer a more modern look, you can place the bulb slightly off-centre for an asymmetrical design.
3. Arrange the Fresh Greens
Begin placing fresh-cut greens (e.g., cedar, fir, or pine) around the amaryllis bulb. Arrange them so that they fan out in both directions under and around the bulb, covering the bottom and sides of the wreath. A trendy option is to create a half-circle of greens, leaving the top of the wreath open for the bulb to grow and bloom freely. Adjust the length and width of the greens to achieve the desired effect – more greens will add drama, while less will create a subtler look.
4. Add Decorative Accents
Personalize your wreath with decorative elements like bobble ornaments, a festive bow, pinecones or berries. Secure each item with wire to keep it firmly in place. This is where you can let your creativity shine!
Optional
Adding a Moss Pocket for Longer-Lasting Greens
To extend the freshness of your greens, you can create a moss pocket. Take two to three handfuls of damp moss and shape it into a firm log (about six to eight inches long). Secure the moss with fishing line or wire and attach it to the wreath, beneath the amaryllis bulb. Insert the cut ends of your greens into the moss, which will help keep the greenery hydrated. Be sure to keep the moss pocket moist by soaking it as needed.
This design can also be created as a table centrepiece by leaving the wreath flat, with the waxed amaryllis bulb pointing upright in the centre, placing gorgeous greens and decorative accents all around.
Aftercare
Amaryllis Bulb
Wax-coated amaryllis bulbs typically bloom in four to six weeks at room temperatures (around 18°C) and will continue to bloom for about three weeks, producing one or two flower stalks with up to four blooms per stalk. The bulb does not require water – only bright natural light and warmth to thrive. Once the blooms fade, the bulb can no longer be forced to flower again, so it should be discarded.
Greens
Mist your fresh greens every two to three days to keep them vibrant. If you’ve used the moss pocket, soak it once or twice a week, ensuring the moss has time to drain throughly before re-hanging the wreath.


