story and photos by Stacey Toews –
Growing food invigorates me. I hope it puts some pep in your step too! The late summer and early fall harvest season on our little 1.5-acre slice of “heaven on earth” in Brentwood Bay has been rewarding and life-giving once again.
As our daylight quota shortens and we anticipate first frost, it’s presumed by many gardeners, even on balmy Vancouver Island, that weather dictates they stop growing food until spring rolls around. I’d like to offer an idea to readers who can’t get enough gardening and wish the colder months wouldn’t cramp their gardening joy. Perhaps this is the easiest way to cheat the seasons and create your own mini micro-climate; have you ever tried growing with the use of a hoop house?
The ultimate benefit of using a hoop house in our area is that you can garden a month earlier in the spring and continue a month later into the fall and winter months. Additionally, it’s inexpensive to build and you can relocate a hoop house over a new garden bed in a few minutes!
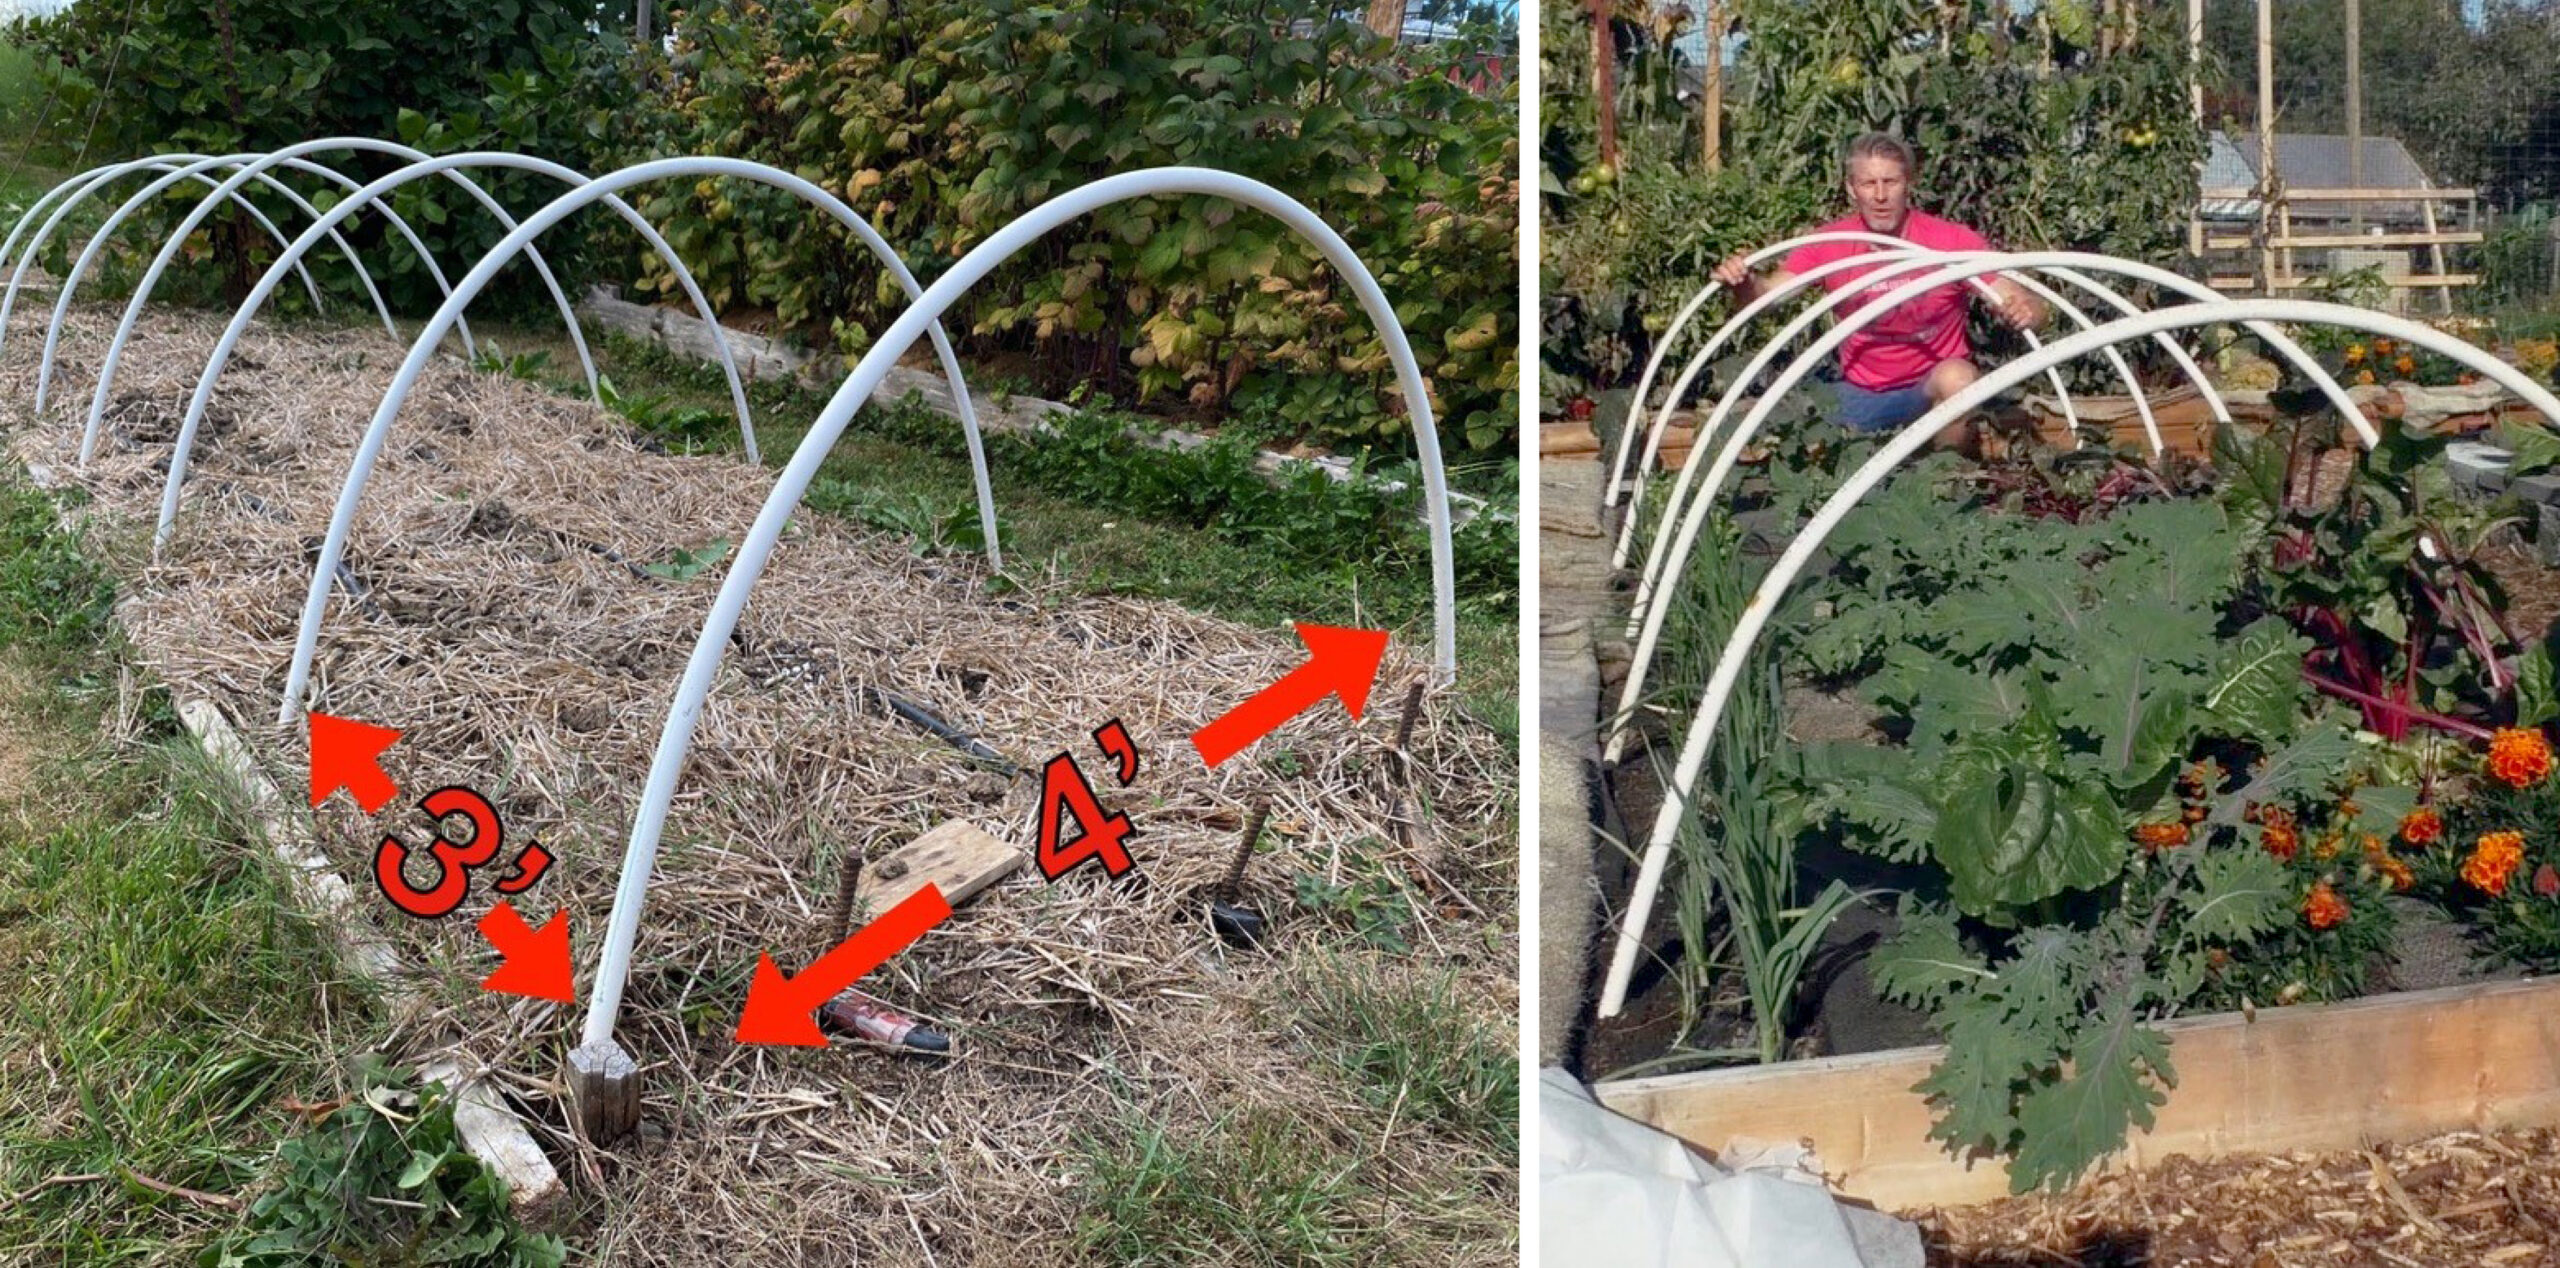
A simple PVC Hoop House has done wonders for me. I’d like to share the benefits and a simple “DIY How To.” There are lots of variations on the idea, but the simplest concept is bending PVC pipes, onto rebar sticking out of the soil, to form a skeleton frame and support – the gardener’s choice of either Reemay Garden Cloth or clear poly.
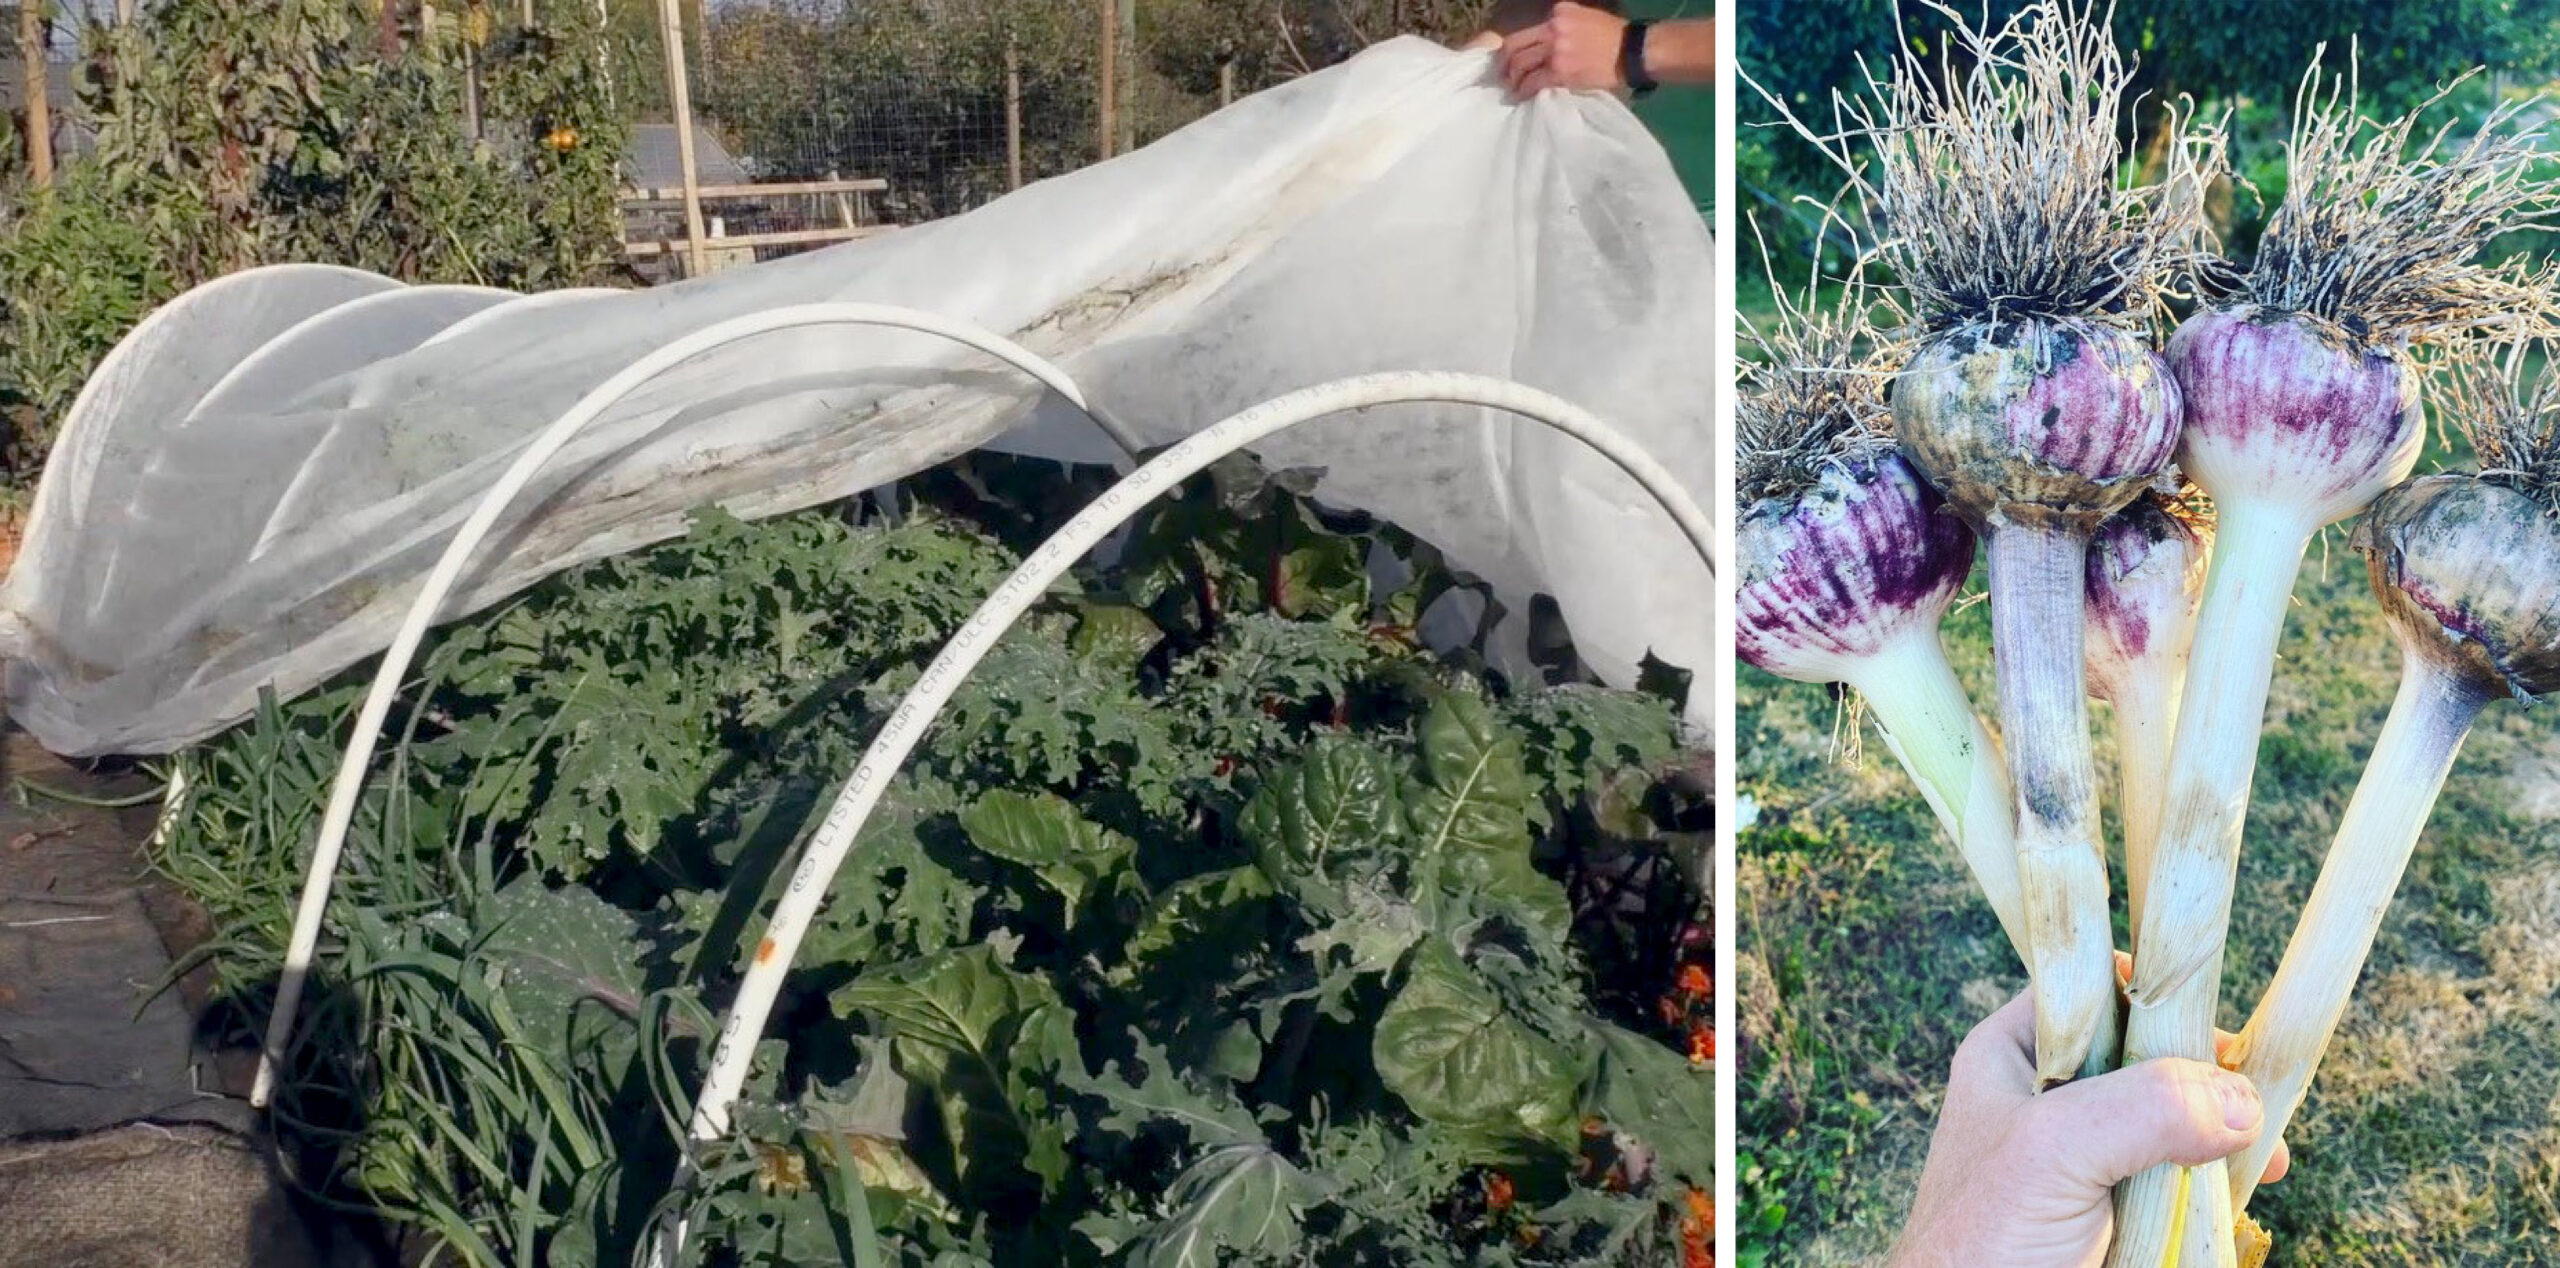
Extending the season for everbearing strawberries has been one of the tastiest crops to enjoy with a hoop house. In spring, berries are generally setting in my hoop house before uncovered plants start to flower. On the other end of the season I’ve pulled back the Reemay Cloth to harvest ripe strawberries in NOVEMBER while it was snowing!
This past year I had another hoop house triumph growing garlic. I had just returned from Quesnel with an abundance of seed garlic in fall. All my outdoor garlic had been planted a month earlier. I decided to try something out on December 1. In about 20 minutes, I built a hoop house over a raised garden bed that’s four by two feet in our garden. Then, I planted six rows (about 240 head) of the seed garlic and draped it with clear poly. The garlic in the hoop house easily sprouted in the short, dark days of winter and, by spring, had surpassed the girth and height of my outdoor, uncovered garlic which I’d planted one month earlier. This was a stunning achievement for the hoop house!
Here’s How to Build One Yourself
Equipment Needed
- Hammer
- Measuring tape
Materials Needed
- Pieces of 10 mm rebar – two-foot lengths are best
- Pieces of ½” PVC piping – cut a 20-foot length into three even pieces (80 inches each)
- Reemay Cloth (aka Row Cover) or clear poly with excess on all four edges to hold down using smooth-edged posts/boards
1. Pound in Rebar pieces with a hammer
- Every three feet pound in rebar down one side of the bed.
- Angle the pieces slightly inward – toward centre of the bed
- Put 2/3 of it in the ground and leave 1/3 sticking up
- On the other side of the bed, four to five feet away from the first side, pound in your rebar.
2. Slide PVC pieces over rebar and bend them to slide over the other side – this creates your structural support.
3. Cut your Reemay Cover or Clear Poly to have EXTRA on each side of your structure.
4. Stretch your cover over the PVC pieces
5. Anchor (hold down) your cover using heavy, smooth-edged posts, lumber or pipes.
If you want a video tutorial: Sustainable Stace is my Youtube Channel. Search for “How to Build a Hoop House.” or visit https://youtu.be/CxTd7IMKR0I


